Electrical problems are the second most common issue we see across Martin County, right behind roof leaks. The difference is that a roof leak damages your RV. An electrical failure can hurt you. Faulty wiring, corroded connections, and failed safety devices cause RV fires every year. The National Fire Protection Association reports that electrical failures are a leading cause of RV fires nationally.
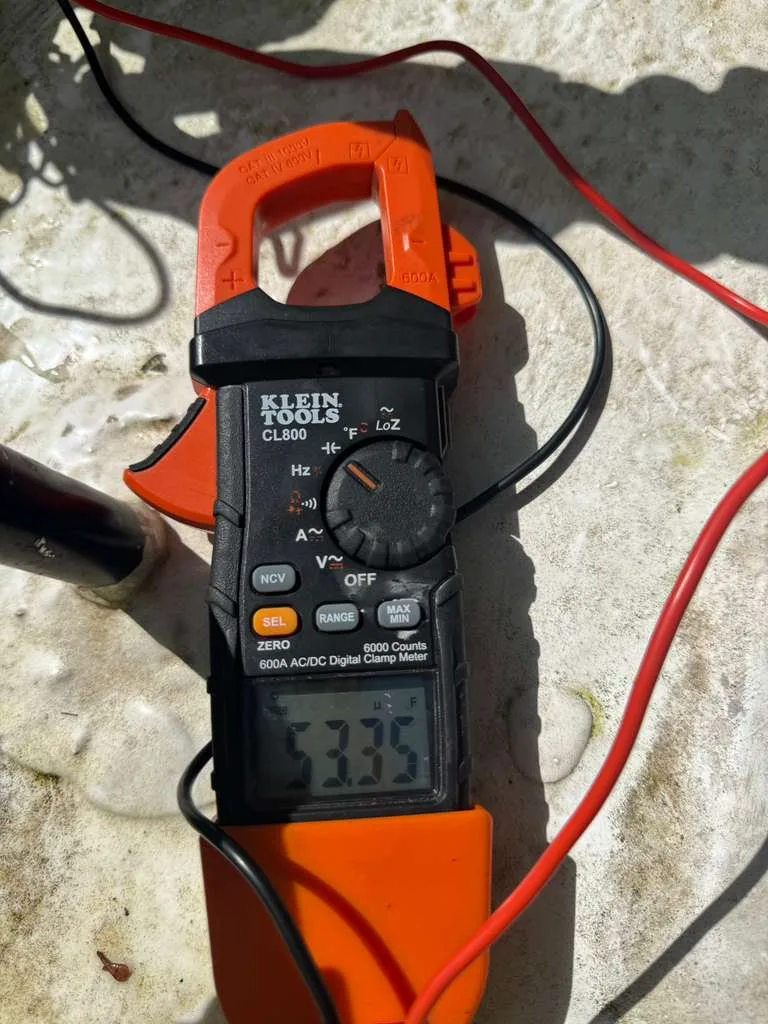
The good news: most electrical problems give you warning signs, and a 30-minute pre-trip inspection catches the majority of them. I've put together the checklist I wish every RV owner would run before heading out. It doesn't require special training or expensive tools. A basic digital multimeter ($15 to $30) and a GFCI tester ($10) are all you need.
Part 1: Shore Power and Pedestal Connection
Before you plug in at a campground, take 5 minutes to inspect the pedestal and your own connection hardware. Bad campground pedestals damage RVs. I see it regularly: a customer plugs into a pedestal with miswired circuits, and their converter, refrigerator control board, or inverter gets fried.
Check Your Power Cord
- Visual inspection. Look at the entire length of your shore power cord. Check for cuts, cracks, exposed wire, or burn marks. Pay special attention to the plug end and the point where the cord enters the RV. These are the two highest-stress areas.
- Prong condition. The prongs on your 30-amp or 50-amp plug should be straight, clean, and show no signs of arcing (black spots or pitting). Burnt prongs mean a loose connection that's generating heat, and heat is what starts fires.
- Cord temperature test. After running on shore power for 30 minutes, feel the cord at the plug end and at the RV inlet. It should be warm but not hot. If it's too hot to hold comfortably, the connection is loose or the cord is undersized for the load.
Test the Campground Pedestal
Buy a surge protector with a built-in diagnostic display, or at minimum, use a plug-in tester that checks for open grounds, reversed polarity, and open neutrals. These cost $10 to $15 and plug right into the outlet. If any indicator shows a fault, don't plug in. Find a different site or report the issue to the campground office.
A portable EMS (Electrical Management System) surge protector costs $200 to $400 and protects your entire RV from voltage spikes, low voltage, miswired pedestals, and surges. It's the single best investment you can make for your RV's electrical system. We recommend the Progressive Industries EMS-HW30C or EMS-HW50C depending on your amp service.
Part 2: Battery Bank Inspection
Your house batteries power everything when you're not on shore power: lights, water pump, furnace fan, slide controls, and more. A battery that's been sitting for a few weeks in Martin County's heat degrades faster than one stored in a cool garage up north.
The 5-Minute Battery Check
- Visual inspection. Look for corrosion on the terminals (white or green crusty buildup), swelling on the battery case, or any signs of leaking acid. Corroded terminals create resistance that prevents proper charging and can cause intermittent power failures.
- Terminal tightness. Grab each terminal connection and try to wiggle it. It should be rock solid. Loose connections create resistance, generate heat, and can arc. Tighten if needed with a wrench.
- Voltage reading. With the RV disconnected from shore power and all loads off, put your multimeter across the terminals. A healthy 12V lead-acid battery reads 12.6 to 12.8V. Below 12.0V means it's deeply discharged and may need replacement if it won't hold a charge after recharging.
- Water level (flooded lead-acid only). Remove the caps and check that the plates are covered with water. Top off with distilled water only. Never use tap water. In Florida's heat, water evaporates faster than in cooler climates, so check this monthly.
- Cable condition. Follow both cables from the battery to their termination point. Look for fraying, corrosion, or melted insulation. Replace any cable that shows damage.
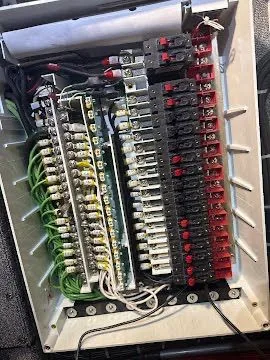
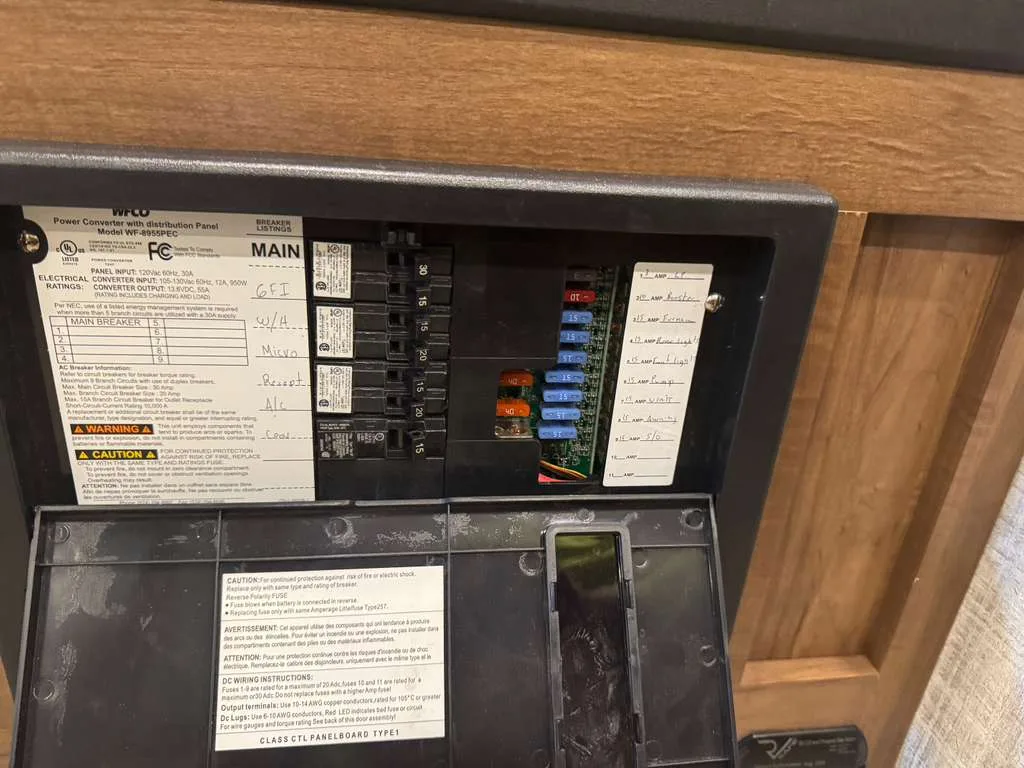
Part 3: Breaker Panel and Fuse Check
Open your main breaker panel (usually in a closet or basement compartment) and your 12V fuse panel. Here's what to look for.
120V Breaker Panel
- Breaker condition. Turn each breaker off and back on. It should click firmly in both positions. A breaker that feels loose, won't stay in position, or trips immediately when turned on has a problem.
- Burn marks or smell. Any discoloration, melted plastic, or burnt smell around a breaker means it's been overheating. Replace the breaker before using that circuit.
- Wire connections. Look at where the wires connect to the breakers. They should be tight and show no signs of arcing or corrosion. If a wire looks discolored or the insulation is melted, that's a fire hazard.
12V Fuse Panel
- Fuse inspection. Pull each fuse and look at the element inside. A blown fuse has a visibly broken or melted element. Replace with the exact same amperage rating. Never upsize a fuse.
- Corrosion. Check the fuse contacts for green or white corrosion. Clean with a small wire brush or contact cleaner. Corroded contacts increase resistance and cause intermittent failures.
Part 4: GFCI Outlet Testing
GFCI (Ground Fault Circuit Interrupter) outlets are your primary protection against electrical shock in wet areas. Your RV should have them in the kitchen, bathroom, and at any exterior receptacle. According to CPSC safety data, GFCIs prevent hundreds of electrocutions annually.
- Press the TEST button on each GFCI outlet. The power should cut off immediately.
- Press RESET to restore power.
- If the outlet doesn't trip when you press TEST, replace it. A GFCI that won't trip can't protect you.
- If the outlet trips but won't reset, there may be a downstream wiring fault. Call a tech.
GFCI outlets cost $12 to $20 each and are straightforward to replace if you're comfortable working with electrical. If you're not, we can swap one in about 15 minutes during a service call.
Part 5: Interior Circuit Walk-Through
Turn on every electrical device and check every outlet in your RV. Yes, every single one. Here's what you're looking for.
- Dead outlets. Plug a lamp or phone charger into every outlet. If one doesn't work, check the breaker, check the GFCI that controls that circuit, and inspect the outlet itself for damage.
- Flickering lights. Flickering 12V lights usually indicate a loose connection, corroded ground wire, or a failing converter. Flickering 120V lights can mean a loose connection at the outlet, breaker, or in the wiring.
- Warm outlets or switches. An outlet or switch that feels warm to the touch has a problem. It could be a loose wire connection, an overloaded circuit, or a failing device. Don't ignore this. Warm connections are the precursor to fires.
- Tripping breakers under load. If a breaker trips when you turn on a specific appliance, the circuit may be overloaded, or that appliance may have a short. Test the appliance on a different circuit. If it trips there too, the appliance is the problem.
The Florida Factor: Heat and Corrosion
Martin County's climate puts extra stress on RV electrical systems in two specific ways.
Heat degrades wiring insulation. Sustained temperatures above 90 degrees, which Martin County hits for 6+ months per year, accelerate the aging of PVC wire insulation. Over time, it becomes brittle and cracks, exposing the conductor underneath. This is especially common in compartments that get direct sun exposure. Check wiring in exterior compartments, under the hood (if you've got a motorhome), and behind the refrigerator where heat accumulates.
Humidity and salt cause corrosion. Ground connections, terminal blocks, and fuse contacts all corrode faster in our climate. A corroded ground wire is one of the sneakiest electrical problems because it causes intermittent symptoms that come and go. One day the lights are dim, the next day they're fine. The fix is simple: clean the connections, apply dielectric grease, and make sure everything is tight.
If you find anything during this checklist that you're not comfortable fixing, or if you'd rather have a professional run through it, call us at 772-271-5270. A full electrical inspection from our team takes about an hour and covers everything on this list plus a few things that require specialized equipment.